Showing posts with label DIY. Show all posts

Friday, June 13, 2014

DIY Money Lei

{We've moved! Visit us at our new and improved blog at: Texas Craft House}

Hi!! 

In the spirit of graduation I wanted to share this money lei I made for my hubby's cousin. I wasn't sure what to get him, but thought a gift card just wasn't enough. I found this money lei idea on Pinterest and used the directions from here only with less bills and papers.

Supplies:
$20 in ones
White computer paper (20 cut to bill size)
Glue dots
Ribbon
Hot glue gun
The concept behind making the pinwheels is super easy, just a little bit tedious. I followed the step by step instructions from the site and enlisted the help of a few people to fold the bills while I glued. The white pinwheels turned out great and were very sturdy with the hot glue, the bills however did not want to stay together with the glue dots, I'm not sure what medium would have been better to keep it all together. I still love how it turned out and just how happy the grad is with his lei!
Happy Crafting!!
<3 Elisabeth

DIY Graduation Caps

{We've moved! Visit us at our new and improved blog at: Texas Craft House}

Hi everyone!!


My sister graduated from high school last year and asked for my help to decorate her cap! She is going to school for nursing and wanted to use that theme. She came to me with a cute idea that she had found on Pinterest where a stethoscope is shaped like a heart.

Friday, May 30, 2014

DIY Destination Wedding Guide for Guests

{We've moved! Visit us at our new and improved blog at: Texas Craft House}

Hi! I'm sharing how I did my itinerary for my Destination Wedding Welcome Bags! I found the brag books, small photo albums, at Michaels for only $1.99, with some coupons and a little bit of running around to several different Michaels stores I got 20 perfect brag books for a good price! Fun fact: The starfish on the cover of the brag book is the same kind that I had for my wedding hair clip, which I ordered here! :)
  {Texas Craft House} DIY Destination Wedding Guide for Your Guests
To Continue Reading Click Here...

Sunday, May 4, 2014

DIY Curtain Rod Wall Decor with Hanging Frames

{We've moved! Visit us at our new and improved blog at: Texas Craft House}

{Texas Craft House} Wall Decor Curtain Rods with Hanging Frames

I have to admit that I am the most proud of this refresh that I've done to my living room wall! I used to have floating shelves with my knick knacks on them and wasn't in love with that look anymore. I had a curtain rod left over from our move a few years ago and I didn't toss it thinking I could do something with it. I'd seen an idea of several frames hanging from a rod and wanted to figure out how to do this. I went back and forth considering ideas and shooting them down because of the sheer weight frames would have on the rod. Like I said years passed and this idea had been gnawing at me, so I started googling different strings of words to try to get more inspiration on how to accomplish my idea. I came across Rodworks.com and they literally have step-by-step directions for "fake hanging," check out the link to see! What is this you ask? Let me show you!! 

To continue reading click here...

Sunday, November 24, 2013

DIY Cupcake Onsies

{We've moved! Visit us at our new and improved blog at: Texas Craft House}


A couple of coworkers recently had a baby and several of us wanted to get something to congratulate them on their babies. One of my girlfriends saw the cutest idea to turn onsies into cupcakes here. We went to Target and bought their Circo brand onsies, which were on Target Cartwheel for an additional 20% off savings! We ended up with 12 onsies and 12 pairs of socks for the gift.

{Texas Craft House}  Cupcake onsies tutorial to give as a baby shower gift, so adorable!

To Continue Reading Click Here...

DIY Lantern Light

{We've moved! Visit us at our new and improved blog at: Texas Craft House}

I love the beach! So I decorated one of my spare bedrooms in a beach theme and I had the hardest time finding the right light for the bedside. Granted today the beach theme is very popular and there are very cute light options out there now that I would have purchased had the options been available. Since things weren't available, I decided that I wanted to make my own light after finding the Morkt Lantern at IKEA that perfectly matched the color scheme in the room.

{Texas Craft House} IKEA Hack: Morkt Lantern Turned into a Bedside Light

To Continue Reading Click Here...

DIY Master Bath Toilet Room Makeover

{We've moved! Visit us at our new and improved blog at: Texas Craft House}

Check out this quick and easy way I made over the toilet room in my master bath on our new blog!!


{Texas Craft House} Master Bath Toilet Room Makeover

  To continue reading click here...

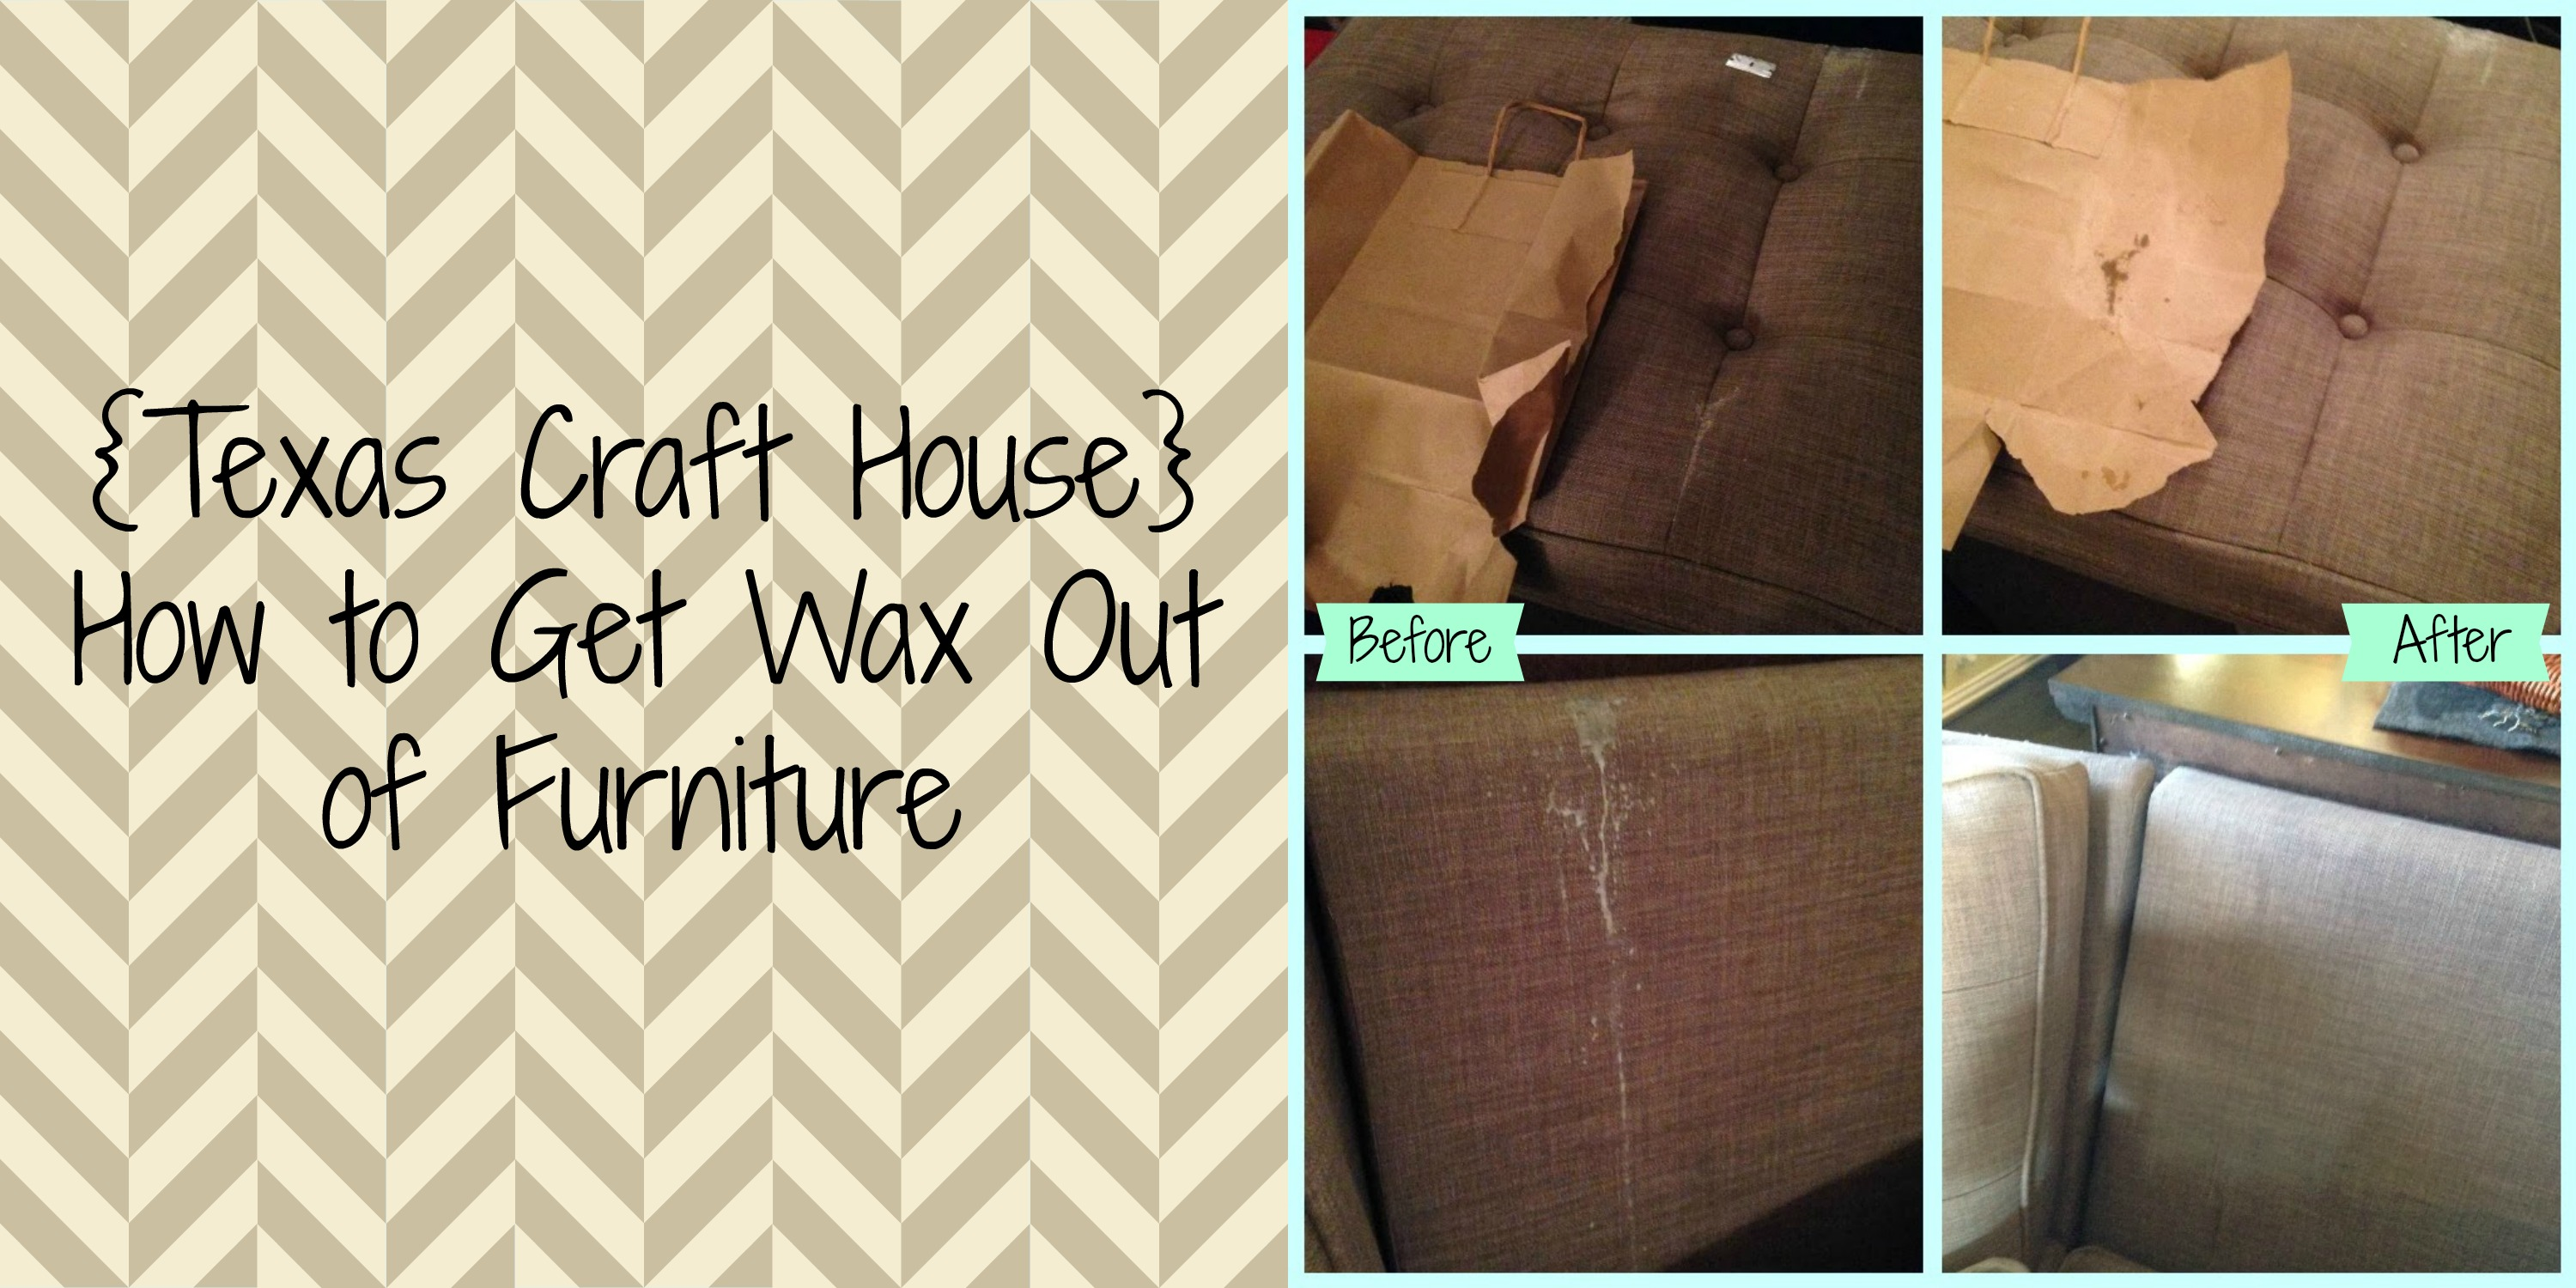
How To Get Wax Out of Furniture

{We've moved! Visit us at our new and improved blog at: Texas Craft House}


So the other night, Hubby was playing with our cat, Tobias, when the worst happened. They knocked over a burning candle all over my new couch! There was wax all over it, needless to say, I was extremely upset and never thought the wax would come out. I started to search ways to get wax out of furniture and found several different ideas. I figured what could it hurt to try some of these. The very first how-to I used worked! All you will need is a paper bag and an iron!

{Texas Craft House} How to get wax out of furniture

To Continue Reading Click Here...

DIY Felt Christmas Stockings

{We've moved! Visit us at our new and improved blog at: Texas Craft House}

Hi Everyone!

I made these stockings a couple of years ago for my hubby, myself and our cats, now that we have a new puppy I want him to have a stocking as well! I went ahead and took step by step photos this time so that anyone else can make their own stockings too. I loved the elf stocking shape and could not find stockings in the store that I liked so I decided 'Why not try to make my own?'

Supplies:
1 yard Felt
1/2 yard fabric for lining
Christmas themed Ribbon
Jingle Bell
Thread to match your ribbon
Batting
Felt Shapes
The first thing I did was draw a stocking pattern. Lucky for me I held onto the one I made several years ago, just in case I got a puppy one day ;) 
I pinned the pattern to my felt and had the felt folded over so that when I cut it, both front and back pieces to the stocking would be cut out at the same time. I only cut one stocking shape of batting for the front side of the stocking and then two more pieces of the fabric I used as the liner.
Then I laid out my ribbons and pinned each one down to the front side of the felt for the stocking. When I sewed the ribbons on I matched the threads I used to each ribbon.
My next addition is the top portion of the stocking, let's call it a bib (I can't for the life of me think of what it should be called!) A few years ago I found the cutest Christmas ribbon that had shapes and beads attached to them, I had no luck finding these this year so I went with an accent ribbon instead of the same colored ribbon as I had used. I folded over the bottom of the bib and pinned the red ribbon onto it. I sewed right across with red thread with no concern for the edges as the will get sewn over in the end. 
Then it came to figuring out what design I would put on the bib. As you can see from my original stockings above I didn't repeat anything. With that in mind I thought of many different thing I could do to  stick with the original theme, because I don't want it to be too obvious that I made this stocking years later. I decided to go with snowflakes again, but in a different pattern. The snowflake felt pieces I had actually were sticky on the back so I stuck them onto the stocking and then sewed through the middle of them in order to make sure they would ensure the test of time.
When it came time for me to sew the bib onto the stocking I had to think further ahead in the project. Lay out all of the pieces to the front of your stocking as if the stocking were completed. So put down your lining, followed by the batting and then the front of your stocking. Go ahead and pin this all together this will help later on. Now to attach the bib you must do the right side of the bib to the wrong side of the stocking. Sew only across the top with a 1/4" hem. I went ahead and did a zig-zag stitch over the edges to keep from fraying. 
Flip over the bib portion and it should now look like the completed front of your stocking.
The same thing will now have to be done to the back of the stocking with the felt and the lining. Before sewing the stocking the together we must stitch the top of the stocking where the opening will be. Work backwards if it's confusing. I laid out the stocking how it was supposed to look once sewn and then flipped the fabric over to sew with a 1/4" hem. Then I pinned the two layers together. 
The next step is to sew the two pinned sections together. Be careful not to get pricked, sew 1/4" around the entire thing. I kept my stitch within the grey lining because it was a little smaller than the felt that had gotten stretched out while I worked with it. Pin in a couple of places and sew! I also zig-zagged all the way around.
For the hook that the stocking hangs from I just took some of the left over fabric and a strip of batting, folded over to cover the seam and then sewed it onto the inside of the stocking. 
Now flip your stocking right side out and attach the jingle bell at the bottom. Voila! You can't even tell I didn't make them all at the same time!


Happy Crafting!
<3 Elisabeth

Wednesday, September 4, 2013

Ikea HACK with Prant boxes

{We've moved! Visit us at our new and improved blog at: Texas Craft House}

My sister and I both have versions of the Expedit line at Ikea. If you try to find storage containers to fit inside the slots anywhere but Ikea it can be hard so when I saw this on pinterest from JustDawnelle I knew this would be what we would do for our containers!

Supplies:
-Prant boxes
-Fabric
-Sta-flo (wal-mart)
-Plastic container
-Box cutter


 Honestly the hardest part about this entire craft was building the prant boxes! Can you see all of the different hammers an mallets we used? We started out with two boxes to see if we liked the look.


I did exactly as JustDawnelle did and cut the fabric with room to shrink with the Sta-flo which was right next to the starch in Wal-Mart. Then I put a small amount in the plastic container and soaked the fabric,


I made sure the fabric was totally soaked. You can get the Sta-flo on your hands it doesn't do anything to you.


Then I put the Prant boxes in the bathroom on the tile, flattened out the fabric onto the front of the boxes and got out all of the boxes. I left it there for two days just because I couldn't get to them sooner and they hardened up very nicely.


It was extremely easy to cut the fabric especially along the metal edges.


I used a sharp box cutter because I didn't have an Exacto knife on hand and cut everything to the size I wanted. It was really easy to run the blade along the metal edge


Cutting the holes out was a little tedious, but nothing hard. I just went around the hole carefully.

Here they are in my sister's apartment!! Hope you enjoy this craft!!

<3 Elisabeth

Friday, August 23, 2013

DIY Repurposed Watering Can

{We've moved! Visit us at our new and improved blog at: Texas Craft House}

Happy first day of spring!! Boy this winter was a tough one, and there was definitely way too much ice and snow! Not the kind of weather I want living in Texas. I was a gardening fiend last spring and in the middle of planting I noticed my old watering can, and then it hit me! I can turn that into a planter! Lucky for me, my dad was over helping with something at the house and had one of his power tools handy.

{Texas Craft House} Old watering can turned flower pot.

To Continue Reading Click Here...

DIY Window Repurposing

{We've moved! Visit us at our new and improved blog at: Texas Craft House}

Hello Everyone!!

Today I want to finally share the window that I repurposed to hold my favorite wedding picture! I found this window at a place called McKinney Trade Days, this is an open air market that is held the third Monday of each month. The window only cost me $18! I got this idea from Diary of a Crafty Lady and fell in love after seeing it on Pinterest!


Sunday, April 28, 2013

DIY Bride Shorts

{We've moved! Visit us at our new and improved blog at: Texas Craft House}

Hi!! I'm sharing the Bride shorts that I made for my wedding day so I could wear them while I was getting ready! This was probably one of the quickest and easiest crafts that I did for the wedding and I still get to use them today!

  {Texas Craft House} How to make and bedazzle your own 'Bride' shorts for under $10 

 To Continue Reading Click Here...

Saturday, April 27, 2013

DIY Thank You Signs

{We've moved! Visit us at our new and improved blog at: Texas Craft House}


Today, I'm sharing the thank you signs that I made for my wedding thank you cards! I saw several different ways to do this on Pinterest and intended on using rectangle shaped plaques until I found these scalloped ones at Michaels!

{Texas Craft House} Wedding Photo Shoot Thank You Signs

To Continue Reading Click Here...

Thursday, February 21, 2013

DIY Barefoot Sandals

{We've moved! Visit us at our new and improved blog at: Texas Craft House}

{Texas Craft House} Simple Barefoot Sandals


Since our wedding would be on a beach my mother-in-law had the best idea about all of the ladies wearing barefoot sandals. We looked at buying them, but my mother-in-law ended up finding a book on how to make them at a thrift store instead. Check out our new blog to see how to!


To Continue Reading Click Here...

DIY Lace Crystal Wedding Garter

{We've moved! Visit us at our new and improved blog at: Texas Craft House}

Hi!!

Today I wanted to share the garter that I made for my wedding! Cassie made her garter, which is posted earlier on our blog and we got the idea for what we wanted our garters to look like from the same website! We just didn't want to spend $190 on a garter we would wear just one day. I found elastic lace from a local fabric shop in downtown Dallas and found the perfect crystal applique online at Glorys House to attach. Total I spent under $15, can you believe that!?!

Supplies Needed:
-White thread
-Needle
-Sewing machine
-Elastic Lace
-Crystal Applique
I took the elastic waste and measured it around my leg. Knowing that I wanted it to be tight enough so that I wouldn't have to worry about it falling on the day of my wedding I tried different sizes before pinning and sewing. I made sure before I began to sew that I put the right sides together and just cut leaving a 1/4" seam allowance and then sewed right along where I pinned.
The toughest part was stitching the applique onto the lace. I wanted to make sure it was centered and straight when I applied it. I tried ironing and it just did not work with the lace so I began stitching like you would begin a cross stitch project. I went all the way around the entire applique making sure to go around the center of the applique as well in order to account for the weight it could put on the lace. 
Here it is on my leg! You can tell that it's tight enough because of the indent on the side of my leg, but not only did it not fall down it didn't even leave a mark.
 I think it looks just like the original, but it's definitely more meaningful to me!
Have fun with your wedding and save money where you can!

Happy Crafting!
<3 Elisabeth

Thursday, January 17, 2013

DIY Oh $h!t K!t Wedding Favors

{We've moved! Visit us at our new and improved blog at: Texas Craft House}

I'm sharing the emergency kits that I made for all of the guests that attended my destination wedding in Jamaica. I came up with the idea from bestdestinationwedding.com and become fond of the name Oh $h!t K!t :) I put these into the Destination Wedding Welcome Bags that I gave my guests, click the link to see how I made those.


{Texas Craft House} Oh $h!t K!t


DIY Glass Sand Jars Wedding Favors

{We've moved! Visit us at our new and improved blog at: Texas Craft House}


{Texas Craft House} Glass Sand Jar Wedding FavorsMy husband proposed to me in Mexico using a spice jar that I had emptied and packed to bring sand home in. We chose to have a sand ceremony the evening before our wedding with our guests so that they could all take a glass jar of sand home from Jamaica to remember their trip and our wedding. It was fun to be able to share the story of our engagement with our guests and then give them a memory of their own with a glass jar full of sand.


 To Continue Reading Click Here...

DIY Pashmina Tags for Wedding Favors

{We've moved! Visit us at our new and improved blog at: Texas Craft House}

Hello!! Today I'm sharing the easiest craft I did for my destination wedding. I gave these pashminas to the ladies that were attending my wedding and put them in their Destination Wedding Welcome Bags. I found the idea to give a pashmina on bestdestinationwedding.com as well as the verbiage "To have and to hold and keep you from cold". This was super easy to do and tied in beautifully with the theme. I found the pashminas on Ebay for $4.99 each! 


  {Texas Craft House} Pashmina Destination Wedding Favors{Texas Craft House} Destination Wedding Welcome Bags 

To Continue Reading Click Here...

DIY Personalized Tumblers

{We've moved! Visit us at our new and improved blog at: Texas Craft House}

Today I'm sharing the personalized tumblers that I made for my destination wedding guests. I put these inside of their Welcome Bags that I made and was surprised by how much my guests loved these, my dad is still using his years after our wedding. I got the idea for this from a past vacation my husband and I took, I read many reviews and found that bringing a large cup that keeps drinks cold is a commodity at all inclusive resorts and quickly went out to buy some Tervis'. For my wedding I wanted guests to be able to use something that would have them stand out as being part of our wedding party and to be a fun reminder of their trip. If you want to learn how to do this yourself visit our new blog and click the link below! 


{Texas Craft House} Using the Cricut to Personalize Tumbler
   

 To Continue Reading Click Here...