Saturday, February 25, 2012
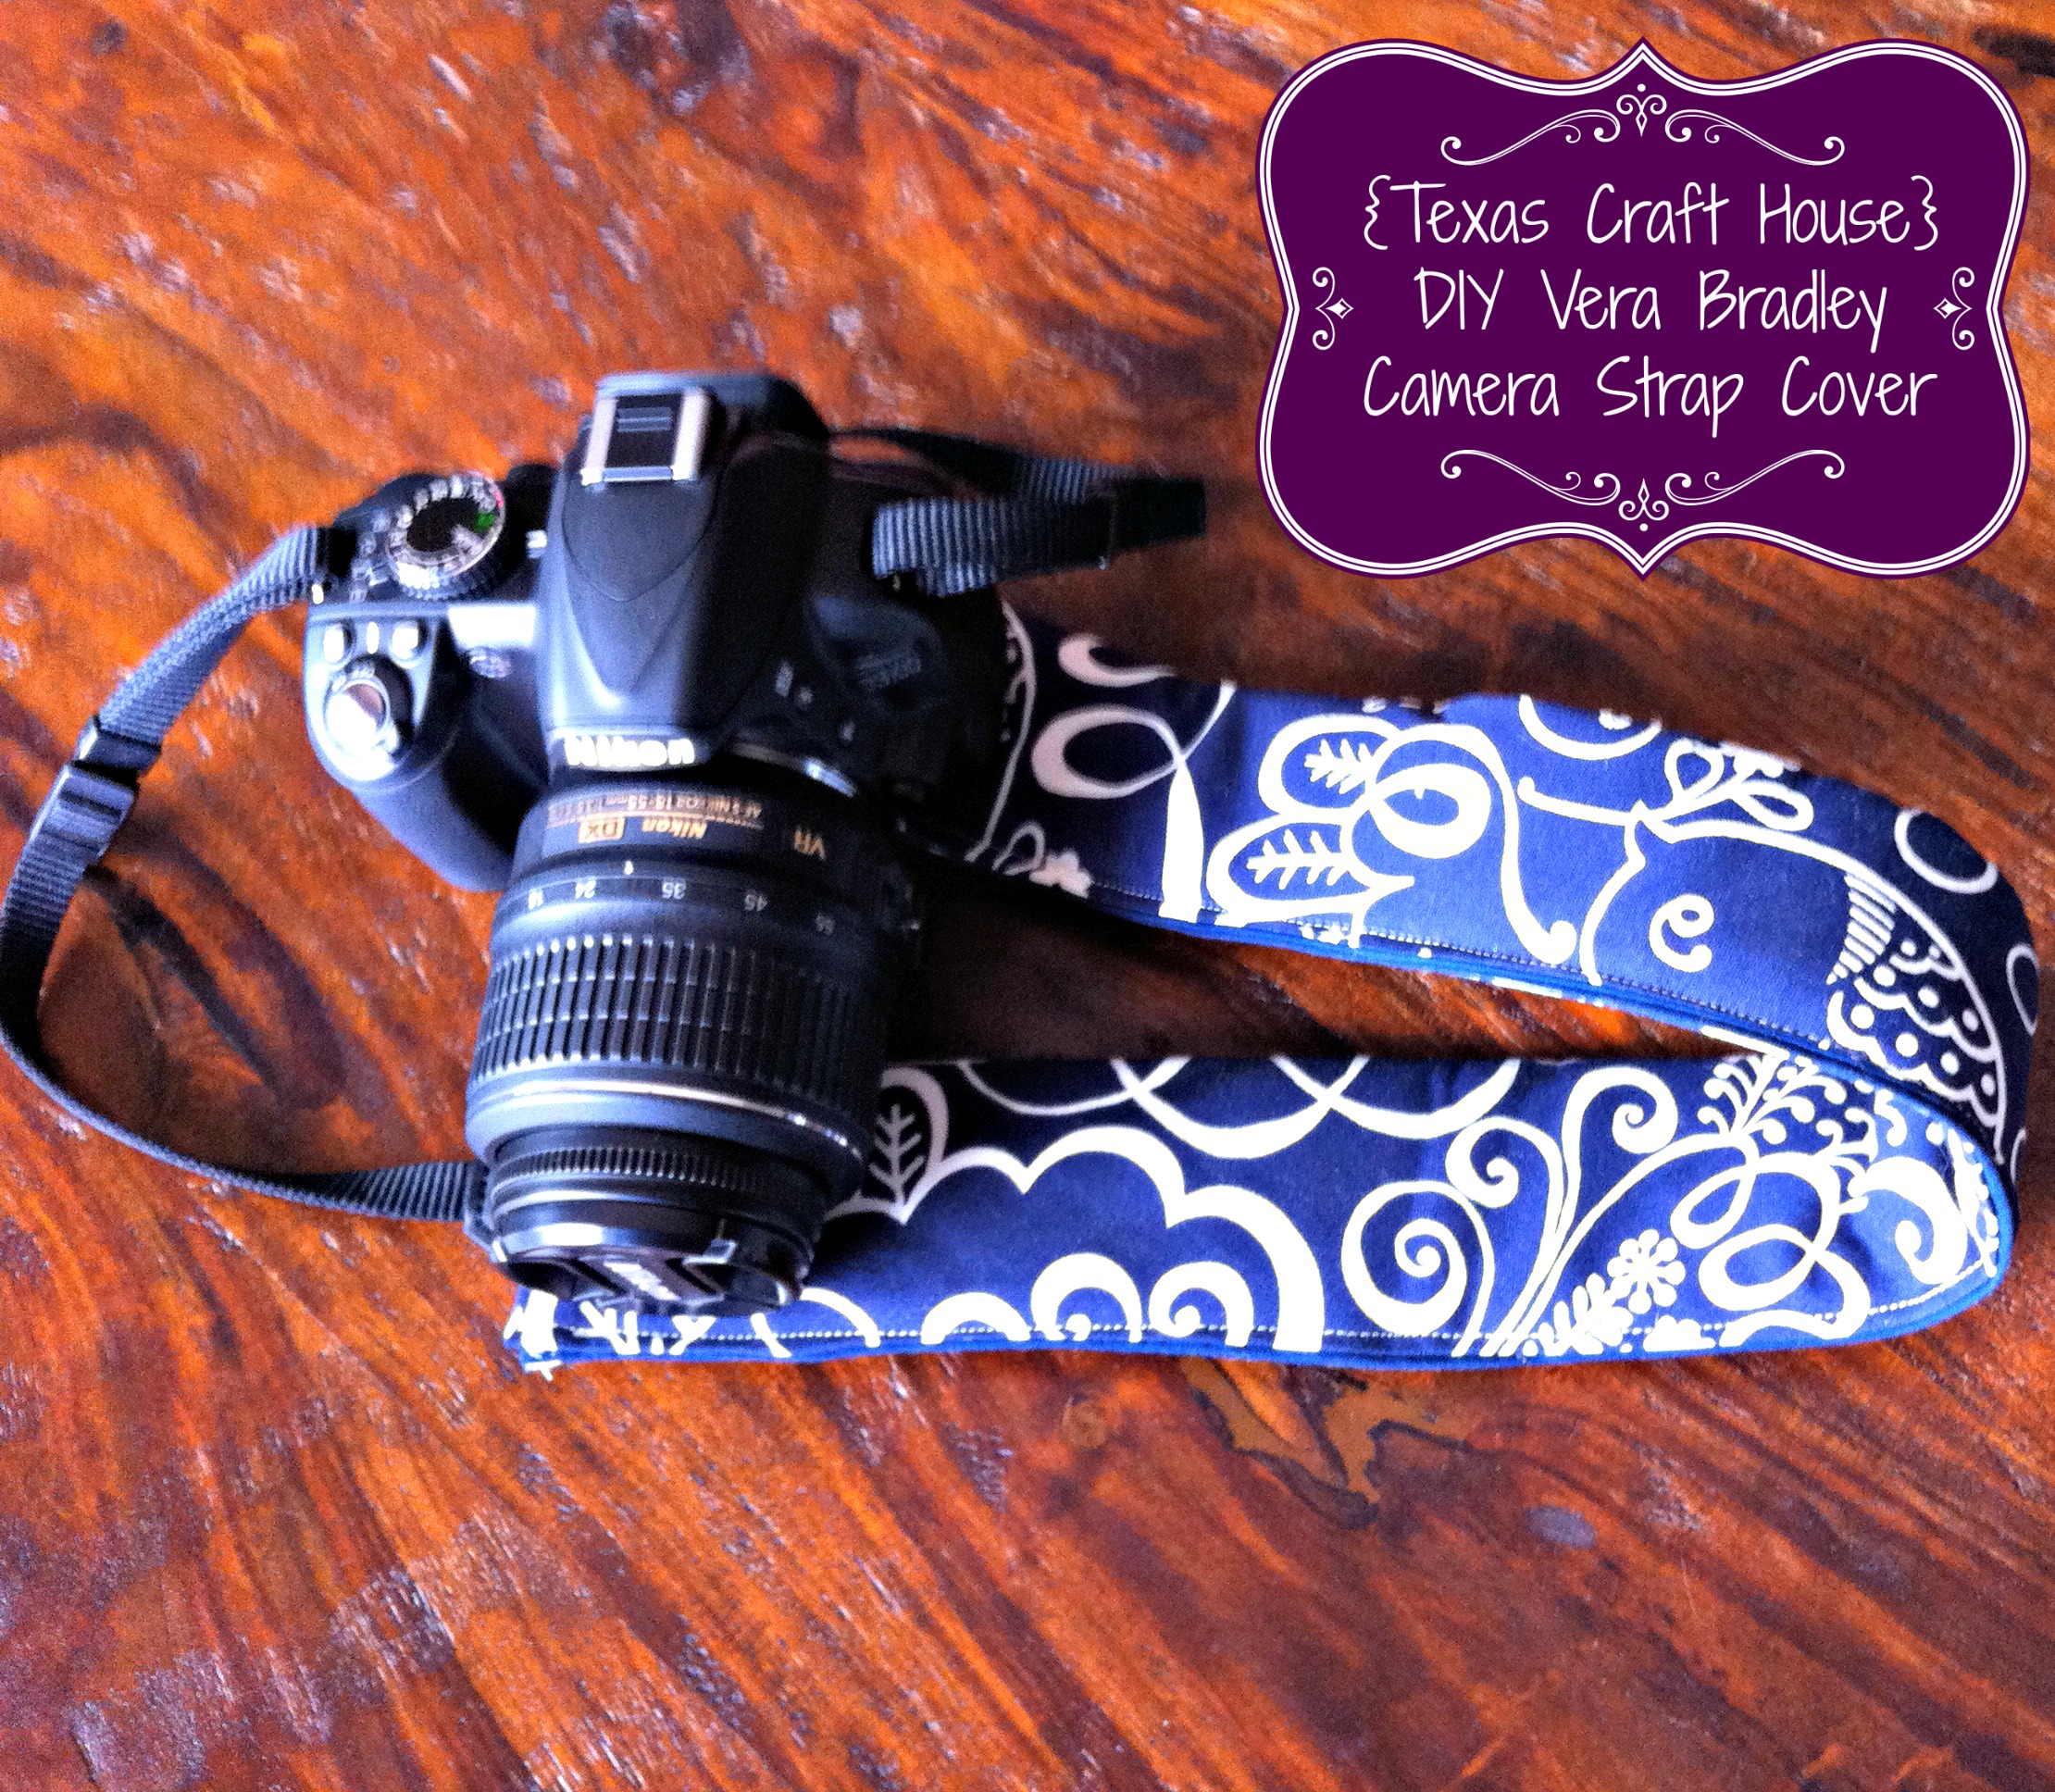
DIY Camera Strap Cover
For Christmas a few years ago, I made my little sister two camera strap covers for her Nikon DSLR camera. I went to JoAnn's and picked a hounds tooth fabric that I knew she would love. I also got ahold of her favorite Vera Bradley pattern, Twirly Birds in Navy, by buying cloth napkins from the website. Naturally, I got the idea from Pinterest and used the tutorial from Priddycreations.com.


DIY Laundry Room Back Splash
My Mom asked me the other day to help her put a back splash up in her laundry room above the sink, she had already gotten all of the supplies from Home Depot so all I had to do was the manual labor. She bought Aspect peel and stick metal long grain silver tiles, some double sided tape so we could get an idea of what the tiles would look like before we began to stick the to the wall, a metal outlet cover, Power Grab Loctite glue. Some tools I ended up needing from my Dad's garage were a screwdriver for the outlet cover, some shears to cut the tiles in half and a black sharpie. My Mom let me know that she wanted the pattern to look like subway tiles and then I was finally able to begin.

Be sure to read all of the directions that come in the Aspect tile box before you begin. These tiles are really neat and they can be used on many different surfaces. So if you're planning on using them on drywall all you have to do is literally peel and stick. Since the wall we were using is already painted we had to use the Loctite as additional sealant to stick. As you can see below you should just put a pea size amount on all of the corners at least 1/2" away from the edge and in the middle.

Since my Mom wanted to have the tiles in the subway tile pattern I knew that I would need to cut some tiles in half, I measured the tiles and drew my sharpie line and cut along the line with my shears. Be sure to complete the cut from the same direction as you started are you will end up with a crooked cut and then you will not be able to place these tiles level against any other tile. Also the Sharpie line comes off really easy with isopropyl alcohol.

Below you can begin to imagine how the back splash will turn out. The outlet proved to be a bit more challenging than I though it would be and I had to figure out whether or not I wanted to cut the tiles to the outlet cover or the actual outlet.

I realized that I wanted to use the outlet cover to hide any of the rough cut marks that would come from cutting the tiles. Something else that is important is to make sure that you do not cover up the small hole that the outlet cover screws into that you can still install the outlet cover. Also I ended up adjusting the tiles so they were not even touching the metal ends at the top and the bottom, that way I could loosen the actual outlet so it would install flush to the outlet cover. You can see in the photo below that we still needed to cut more room for the entire outlet.

Below you can see the outlet cover installed.

It's really coming along now! My mom decided that she really liked the way the step up led up to the cabinet on the left hand side of the back splash so we kept it that way instead of creating a straight line on that edge. There was also a plastic protector on each tile that we removed after the install was complete.

Before:

After:
 This project took about an hour and a half, but was really easy going. It changed the whole look of the room and added a great look to it. Hope you enjoy this DIY!
Elisabeth
Monday, February 6, 2012
DIY Tool Belt
While watching the Super Bowl I decided it was finally time to complete my tool belt that I'd been thinking about for quite come time now. I went to Home Depot and got this apron for only $0.77 and believe it or not that's all I spent on this project!

I used my sewing machine which is the machine I use for all of my sewing crafts the Brother CE-4000.

I went through my scrap fabric and I chose these two fabrics because I loved the way they looked together, I got them both from JoAnn's a few years ago. I also used red thread so it would pop against the fabric.

I cut enough fabric so that I would not have to sew the bottom seam of the apron. I pinned the blue fabric along the sides of the apron and made sure that the fabric lined up on both sides of the apron. I made sure not to pin the pockets closed. I did a 1/4" turn hem on the two sides and along the top that runs along the top of the pockets.

I hadn't planned on covering the back of the apron when I first started thinking of this project, but I ended up having enough fabric to do so. After pinning the blue fabric, I pinned the yellow fabric to the back of the apron like pictured below with a 1/4" turn hem.


And then I flipped the apron back over to the front and pinned as far into the pockets as I could. This is when the project get a lot harder than I had planned for.

I realized I would have to sew along each pocket by fitting each pocket onto the base of my sewing machine so that I would not sew the pockets shut. The hardest part was feeding the pockets through to complete the stitch because it was circular and the apron has two separate pockets rather than one big pocket. Because of this I was unable to get a solid stitch from one side to the other.

When it came time to sew the yellow fabric I stitched as close to the pocket as I could so the seam would be covered as much as possible. When I was done I tried it on and used my sewing scissors as a tool for my new tool belt!

Now I'm ready to decorate our new house!
Elisabeth
Monday, January 30, 2012
DIY Handmade No Sew Tutu
{We've moved! Visit us at our new and improved blog at: Texas Craft House}
Today's craft was so much fun! I went to my sister in law's baby shower this weekend and she absolutely loved my wooden stackable cross that I made earlier this month. I loved seeing all of her other gifts. Right away I noticed a tutu that was given to her and I quickly investgated. :) I realized it was made out of a simple headband, tulle, and there was absolutely no sewing involved. This shocked me because tutus can be so expensive! Well not anymore! My tutu craft cost LESS than $5.00! It would make the perfect gift for any little girl in your life. :)

Today's craft was so much fun! I went to my sister in law's baby shower this weekend and she absolutely loved my wooden stackable cross that I made earlier this month. I loved seeing all of her other gifts. Right away I noticed a tutu that was given to her and I quickly investgated. :) I realized it was made out of a simple headband, tulle, and there was absolutely no sewing involved. This shocked me because tutus can be so expensive! Well not anymore! My tutu craft cost LESS than $5.00! It would make the perfect gift for any little girl in your life. :)
Elisabeth's birthday
{We've moved! Visit us at our new and improved blog at: Texas Craft House}
Welcome back to Connoisseur of Creativity. We had such a fun time this weekend celebrating Elisabeth's birthday at Painting With a Twist (paintingwithatwist.com). If you have never been here, please visit their website and find one near you. You can sign up for 2 and 3 hour painting classes or schedule a private painting party! While painting you can enjoy your own wine and snacks. They take the painting step by step and ensure that you leave with a masterpiece. This is the best girls night out! It is so much fun to go!
Below are some pictures chronically our wonderful evening! Elisabeth chose a sandy/seashell painting to go along with her destination beach wedding in Jamaica this summer. I think it turned out so cute!


Welcome back to Connoisseur of Creativity. We had such a fun time this weekend celebrating Elisabeth's birthday at Painting With a Twist (paintingwithatwist.com). If you have never been here, please visit their website and find one near you. You can sign up for 2 and 3 hour painting classes or schedule a private painting party! While painting you can enjoy your own wine and snacks. They take the painting step by step and ensure that you leave with a masterpiece. This is the best girls night out! It is so much fun to go!
Below are some pictures chronically our wonderful evening! Elisabeth chose a sandy/seashell painting to go along with her destination beach wedding in Jamaica this summer. I think it turned out so cute!

I hope you enjoyed the pictures as much as we did. Please visit http://www.paintingwithatwist.com/ to find a location near you and to enjoy a night out with wine, painting, friends and family. :)!
Check back for a craft soon!
Cassie :)

Thursday, January 26, 2012
DIY Wine or Decorative Bottle Stopper with Drawer Pulls
{We've moved! Visit us at our new and improved blog at: Texas Craft House}
Hope you have had a great week!
I can't wait for this weekend. Saturday is Elisabeth's birthday and we are going to Painting With a Twist for a private painting party. We will post pics in a few days and show you the artwork we made while enjoying a glass of wine. Speaking of wine... today's craft is a bottle stopper that you could use for empty glass bottles or wine bottles.

To continue reading click here...
Hope you have had a great week!
I can't wait for this weekend. Saturday is Elisabeth's birthday and we are going to Painting With a Twist for a private painting party. We will post pics in a few days and show you the artwork we made while enjoying a glass of wine. Speaking of wine... today's craft is a bottle stopper that you could use for empty glass bottles or wine bottles.
To continue reading click here...
Sunday, January 22, 2012
Bachelorette Party Cookies
{We've moved! Visit us at our new and improved blog at: Texas Craft House}
I hosted a bachelorette party a few months ago and wanted to bring some cute themed treats to the party. I found this idea on Pinterest and knew right away these would be perfect. I began by getting my supplies from Target, I got Market Pantry sugar cookie dough and a whole bunch of different colored Wilton's decorator's icing. I already had a heart shaped cookie cutter and several different kinds of sprinkles so I did not buy those. I followed the directions that were on the package to make cut out sugar cookies and I began cutting. After baking them, I began decorating different styles of bras and underwear. I did learn that the Wilton's decorating icing was better for the outline of the underwear and the Wilton's sparkle gel spread better to put color on the whole cookie. Here are my finished cookies!! Hope you love them!
I hosted a bachelorette party a few months ago and wanted to bring some cute themed treats to the party. I found this idea on Pinterest and knew right away these would be perfect. I began by getting my supplies from Target, I got Market Pantry sugar cookie dough and a whole bunch of different colored Wilton's decorator's icing. I already had a heart shaped cookie cutter and several different kinds of sprinkles so I did not buy those. I followed the directions that were on the package to make cut out sugar cookies and I began cutting. After baking them, I began decorating different styles of bras and underwear. I did learn that the Wilton's decorating icing was better for the outline of the underwear and the Wilton's sparkle gel spread better to put color on the whole cookie. Here are my finished cookies!! Hope you love them!

<3 Elisabeth

Subscribe to:
Posts (Atom)